

Quick Reference Guide for Optimal Performance
This guide covers setup and everyday use of the Swell Form machine, Swell Touch paper, and Swell Touch markers. For product details, specifications, and pricing enquiries, visit the Swell Form machine, Swell Touch paper, and Swell Touch markers product pages.
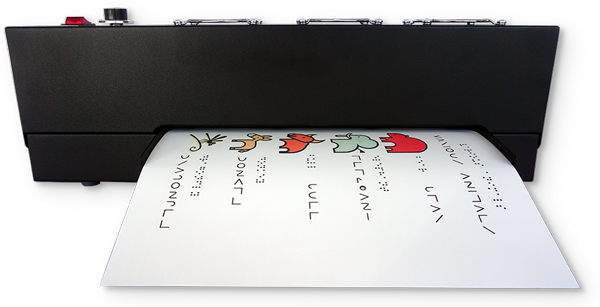
Swell Form Machine
Setup
Before operating the machine, read the Swell Form Machine Guide in full to ensure safe and optimal use.
Set up your Swell Form machine in an open, well-ventilated area on a stable, flat surface. Ensure there is sufficient space behind the machine to allow finished tactile graphics to exit freely.
- Attach the paper infeed tray securely
- Confirm adequate clearance at the rear of the machine
- Ensure ventilation openings remain unobstructed
When powered on, the fans will begin operating immediately. The heat lamp will activate only once paper is fed into the machine.
Temperature Settings
The temperature scale ranges from 0 (lowest) to 10 (highest), and should be adjusted based on the type of graphic being produced. The settings below are general guidelines and may vary depending on the graphic, ink, and operating conditions.
- Fine lines: begin around 7
- Thick lines: begin around 4
- Large filled areas: use lower settings and consider patterns instead of solid fills
For best results, start at a lower temperature and increase gradually if additional swelling is required. Sheets may be processed more than once to increase height; however, do not exceed three passes.
If raised areas appear bubbled, the temperature may be too high, the ink may not be fully dry, or the sheet may have been processed too many times.
Swell Touch Paper
Swell Touch paper is specially formulated to react with heat and carbon-based ink, causing black areas to rise and form tactile graphics.
The textured, off-white side is the printable or drawable surface, while the smooth white side acts as a liner and will not produce a raised effect.
- Use only Swell Touch paper with the Swell Form machine
- Avoid folding, bending, or creasing the paper
- Some dark, non-black inks may produce slight swelling if they contain carbon
Swell Touch Markers
Swell Touch markers are specifically developed for optimal performance with Swell Touch paper and Swell Form machines.
- Fine-line markers require higher temperatures and produce more subtle swelling
- Thick markers require lower temperatures and can achieve maximum swell in a single pass
- For mixed graphics, start at a lower temperature and adjust as needed
- Always replace caps after use to prevent drying
Other markers may be used; however, results may vary.
Your First Tactile Graphic
Begin by testing a single graphic to confirm settings before producing multiple copies.
- Turn on the machine and set the desired temperature
- Gently feed the sheet into the infeed tray (graphic facing upward)
- Allow the machine to process the sheet automatically
- Retrieve the finished tactile graphic from the rear
Ensure ink is fully dry before processing. You may use the provided sample sheets, your own printed graphics, or draw freehand using a Swell Touch marker.
Keeping a record of temperature settings, line thickness, and results can help ensure consistent outcomes in future use.
Creating Effective Tactile Graphics
Designing for touch requires clarity and simplicity. Well-structured graphics are easier to interpret and more effective for users.
- Focus on one or two key concepts per graphic
- Use multiple graphics for more complex information
- Include a key to explain line types or textures
- Maintain adequate spacing between elements
- Avoid overcrowding, which can reduce readability
Provided by American Thermoform and Zychem, Tactile Library offers links to downloadable graphic collections, specialist guidance and answers to common questions about tactile graphics using swell paper.